



















Most people start planning a TV panel design by scrolling through inspiration photos — and end up overwhelmed by options that don’t actually fit their room or budget. Instead of another style list, this guide takes a more practical route: how to plan your TV panel based on your room size, your budget, and a step-by-step process, so you land on a design that actually works for your space.
Start With Your Room, Not the Design
Before picking a style, it helps to think about what your room is telling you.
Small Living Rooms (Under 150 sq ft)
Avoid heavy, dark, or overly textured panels — they can make the wall feel like it’s closing in. Instead:
- Stick to lighter tones or high-gloss finishes that reflect light
- Keep the panel flush with the wall rather than adding bulky projecting units
- Use vertical lines (like slatted or fluted laminate) sparingly, just as an accent strip rather than covering the whole wall
Medium to Large Living Rooms (150–300 sq ft)
This is where you have the most flexibility:
- Bolder colours, deeper textures, or a full floor-to-ceiling unit all work well
- Asymmetric or split-panel designs (mixing two materials) look intentional rather than crowded
- Built-in storage becomes more practical here, since there’s wall space to spare
Open-Plan or Studio Layouts
The TV panel often needs to double as a visual divider between the living and dining or kitchen zone:
- A floor-to-ceiling panel with storage on both faces works well as a soft partition
- Choose a finish that reads well from multiple angles, since the panel will likely be visible from more than one seating direction
Plan by Budget, Not Just Style
It’s easier to shortlist realistic options when you start from what you’re willing to spend, rather than falling in love with a design first.
Budget-Friendly (Laminate-Based)
- A flat panel finished in decorative laminate — woodgrain, matte, or solid colour
- Simple slatted wood-look laminate for texture without a big spend
- Cost stays low because installation is straightforward and materials are standardised
Mid-Range
- Textured or fluted laminate panels for a more architectural look
- Small sections of metallic-finish laminate as accents
- Basic built-in storage combined with a laminate-finished back panel
Premium
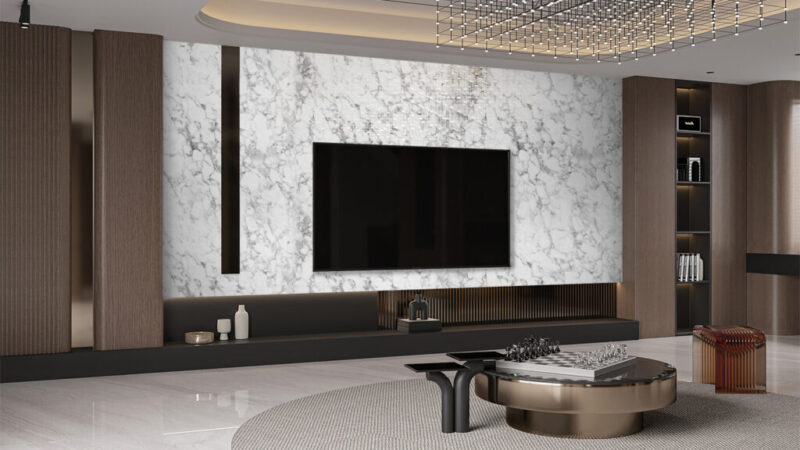
- Backlit marble-finish HPL panels with LED strip lighting
- Full floor-to-ceiling custom units with mixed materials (wood + stone-look + metallic trims)
- Upholstered fabric or leather sections for acoustic and visual softness
Practical tip: You don’t need to commit fully to one tier. A budget-friendly laminate base with one premium accent — like a strip of backlit marble-finish HPL — often gives 80% of the high-end look at a fraction of the cost.
Step-by-Step: How to Plan Your TV Panel Design
- Measure the wall and TV placement first. Decide the TV’s height and centre point before designing around it — this avoids an awkward, off-balance panel later.
- Plan cable and wire routing early. Whether you’re using slats, a hollow panel, or a chase behind the wall, decide this before installation, not after the panel is up.
- Choose your base material. Laminate or HPL is the practical starting point for most homes — decide on finish (matte, gloss, textured, woodgrain) based on your room’s lighting and existing furniture.
- Decide on storage needs. If you need to store a set-top box, gaming console, or speakers, build shelving or a cabinet into the design rather than adding it later.
- Add lighting if desired. Backlighting or LED strips should be wired in during installation — retrofitting lighting afterward is far more disruptive.
- Get a sample panel before committing. Laminate and HPL sheets look different under your actual room lighting than they do in a catalogue or online photo — always check a physical sample first.
Common Mistakes to Avoid
- Going too dark in a small or poorly lit room – it can make the space feel smaller and heavier than intended
- Skipping cable planning – leads to visible wires running across an otherwise clean design
- Ignoring maintenance requirements – high-gloss finishes look stunning but need more frequent cleaning to avoid visible smudges and dust
- Overcrowding the wall – combining too many textures, colours, or materials on one panel can look busy instead of designed
- Not checking finish under your actual lighting – a warm-toned bulb can shift how a laminate colour reads compared to daylight or cool white lighting
Trending Finishes for TV Panels in 2026
- Warm woodgrain laminates – walnut and oak tones remain a reliable, timeless choice
- Matte charcoal and deep greys – popular for a cinematic, low-maintenance look
- Marble-finish HPL with backlighting – still the go-to for a premium, statement wall
- Fluted/textured laminate accents – used as a strip or border rather than covering the entire wall, for a more restrained, modern look
Quick Comparison: Laminate vs HPL vs Natural Materials for TV Panels
| Factor | Decorative Laminate | HPL Panel | Natural Stone/Wood |
|---|---|---|---|
| Cost | Low–Medium | Medium | High |
| Durability | High | Very High | Very High (with upkeep) |
| Design Variety | Very Wide | Wide | Limited to natural patterns |
| Maintenance | Easy | Easy | Higher (sealing, polishing) |
| Installation Time | Fast | Fast | Slower, more specialised |
FAQs About TV Panel Design
Q1. How do I choose a TV panel design for a small living room? Stick to lighter tones, high-gloss or matte laminate finishes, and keep the panel flat against the wall rather than adding bulky projecting units — this helps the room feel larger.
Q2. What’s the most budget-friendly way to get a premium-looking TV panel? Use a laminate base for most of the panel and add one premium accent, like a strip of backlit marble-finish HPL, instead of covering the entire wall in an expensive material.
Q3. Should I plan lighting before or after installing the TV panel? Before. Wiring for backlighting or LED strips needs to be planned during installation — adding it afterward usually means reopening finished work.
Q4. Is laminate or HPL better for a TV panel? Both work well. HPL offers slightly better impact and scratch resistance, while laminate typically costs less and offers a wider design range. For most homes, laminate is the more practical everyday choice.
Q5. How do I stop my TV panel from looking too busy? Limit yourself to two, at most three, materials or finishes on a single wall. Use texture or bold colour as an accent rather than spreading it across the entire panel.
Final Thoughts
A good TV panel design isn’t just about picking a style from a photo — it’s about matching the design to your room’s size, planning cables and lighting ahead of time, and choosing a budget tier you can commit to without regret. Start with a practical laminate or HPL base, add one or two accents that reflect your style, and you’ll end up with a wall that looks intentional rather than assembled after the fact.
Disclaimer: Design trends and material pricing vary by brand, region, and project scope. Consult your interior designer or laminate supplier for recommendations specific to your space.